
Share Now:

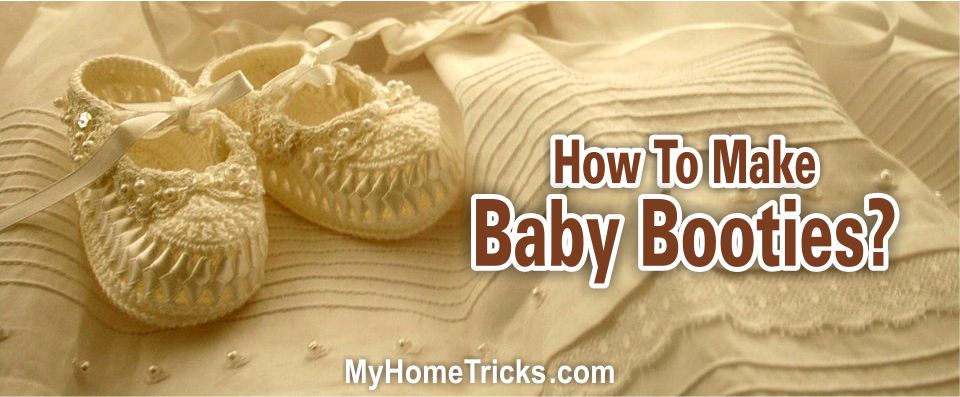
Baby Booties
Making baby booties for your baby, granddaughter, niece or a relative’s baby is an event that will make you happy. This is one of the tasteful things you can do by adding your love in it.
Worked using just chain and double crochet stitches, these delicate Baby Booties are an ideal way to learn how to increase and decrease stitches. The shaping is created by working twice into one stitch for the increases and simply missing the necessary stitches for the decreases.
Size: Finished shoe measures 10cm (4in) from toe to heel.
What You Will Need To Make Baby Booties
- 1 x 50g (2oz) ball of Coats Musica 5 crochet cotton.
- 1,75mm crochet hook.
- 1m (1 yd) of narrow ribbon.
Tension – Make Baby Booties
32 sts and 38 rows to 10cm (4in) measured over double crochet fabric using 1.75mm hook. Shoe (Worked in one piece, starting at heel edge of the sole) Sole. Using 1.75mm hook, make 7 ch.
- 1st row (RS): 1 dc into 2nd ch from hook, 1 dc into each ch to end, turn. 6 sts.
- 2nd row: 1 ch (does not count as st), 2 dc into first dc, 1 dc into each of next 4 dc, 2 dc into last dc, turn. 8 sts.
- 3rd row: 1 ch (does not count as st), 2 dc into first dc, 1 dc into each of next 6 dc, 2 dc into last dc, turn. 10 sts.
- 4th row: 1 ch (does W0f count as st), 1 dc into the first dc, 1 dc into each dc to end, turn. Last 4 rows set double crochet fabric, with increased sts at both ends of the 2nd and 3rd rows. Cont is now set, including one st at both ends of the 7th, 13th, and 21st rows. 16 sts. Work 12 rows without shaping Now dec one st at both ends of the next row. 14 sts. Work one row.
Dec one st at both ends of the next 3 rows. 8 sts. This completes the sole section. Shape upper Including one st at both ends of next 7 rows and foil 4 alt rows. 32 sts.
- Shape first side 54th row (WS): 1 ch (does not count as st), 1 dc into the first dc, 1 dc into each of next 8 dc, turn. Work on these 9 sts only for the first side. Dec one st at beg of next row. 8 sts. Work one row. Including one st at the end of the next row. 9 sts. Work one row.
- Including one st at the beg of the next row and at the same edge of foil 2 rows. 12 sts. Including one st at both ends of the next row. 14 sts.
- Make buttonhole 63rd row: 1 ch (does not count as st), 1 dc into each of first 2 dc, 1 ch, miss 1 dc, 1 dc into each of next 11 dc, turn.
- 64th row: 1 ch (does not count as st), 1 dc into each of first 11 dc, 1 dc into next ch sp, 1 dc into each of last 2 dc, turn. Work one row. Including one st at beg and dec one st at the end of the next row. 14 sts. Work I row. Dec one st at the end of next and foil 2 alt rows. 11 sts. Work 4 rows. Fasten off.
You may also be interested in:
— How to Do Fastening Zip?
— How Can I Make Menu Cards At Home?
— How to Create Paint Effects on Walls Interiors?
Shape Front Tab – Make Baby Booties
- Return to the last complete row worked before the first side, and miss the first 2 dc after the first side, attach yarn to the next st, and proceed as follows.
- 54th row (WS): I ch (does not count as st), I dc into dc where the yarn is attached, I dc into each of next 7 dc. Turn work on these 8 sts only for the front tab. Dec one st at both ends of the next 2 rows. 4 st. Work 16 rows. Fasten off.
- Shape the second side Return to the last complete row worked before the first side and front tab, miss the first 2 dc after the front tab, Each yarn to the next st and proceed as follows:
- 54th row (WS): 1 ch (does not count as st), 1 dc into dc where the yarn is attached, 1 dc into each of next 8 dc, turn. Work on these 9 sts only for the second side.
- Now complete the second side as for the first side by working from * to *, reversing shaping by working it at the opposite end of the row to the first side and making a buttonhole in the 63rd and 64th rows thus:
- Make buttonhole 63rd row: l ch (does not count as st), 1 dc into each of first 11 dc, 1 ch, miss 1 dc, 1 dc into each of next 2 dc, turn.
- 64th row: 1 ch (does not count as st), 1 dc into each of first 2 dc, 1 dc into next ch sp, 1 dc into each of last 11 dc. turn.
Finishing Baby Booties
Join the heel seam of the sides. Matching heel seam to center of foundation chain edge of the sole, sew upper to the sole. Starting and ending at the end of the front tab, work one row of dc along the entire upper edge of the shoe. Fasten off. Fold the last 8 rows of the front tab to the inside and stitch it in place. Cut the ribbon into 2 equal lengths and thread each length through buttonholes and the loop of the front tab. Tie the two ends in a bow on top of the foot. Then your Baby Booties is ready.
Tip: If you would like to find other articles on similar subjects of “Baby Booties”, browse the “tags” below.