Share Now:

Wallpaper Awkward Areas
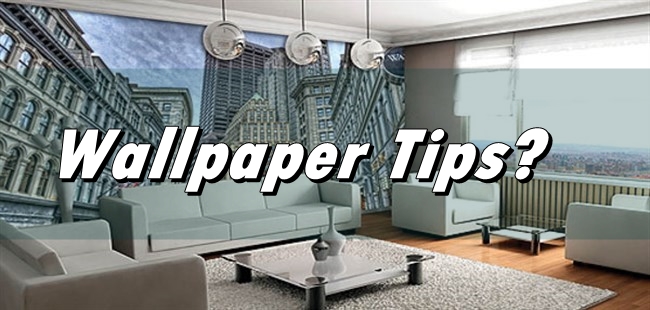
Wallpapering is a very effective tool for interior design. You can change the feel of a whole room just with new wallpaper. A well-chosen wallpaper pattern can make your house look more luxurious. In this article, we will talk about a topic that will be very useful during your DIY activities, at home. How can you wallpaper awkward areas?
Using wallpaper is also quite easy. With some practice, you can install new wallpapers in your home very well yourself. However, in almost every room, there are some areas that are more challenging to install wallpapers. For such areas, you may have to learn how to wallpaper awkward areas and modify your technique. Once learned, however, those areas will become easy too.
How To Wallpaper Awkward Areas
Here, we are having a look at some of the common awkward areas to install wallpaper, and how you can deal with them yourself. Let’s see what you can do.
Wallpapering Around Windows And Doors – Wallpaper Awkward Areas
Windows and doors are the most common obstacles in rooms while wallpapering. You need to learn the correct procedure for covering around them. Then you can stick to a systematic approach that can be adapted depending on the design and size of each door and window.
- Keeping moisture out: Window recesses are often get affected by condensation and moisture. This moisture can cause wallpaper to bloat and lift over time. To protect wallpaper from moisture damage, you can run some clear silicone around the window frame where it meets the wallpaper. The silicone both secures the wallpaper firmly and stops the moisture.
- Hiding overlaps: As you cut the wallpaper when you get to the gaps, small overlaps may be unavoidable around windows. You can try to position overlapping seams so that curtains will conceal them.
- Preventing accidents: During the wallpapering process, you will need to go up on a ladder to access high areas on your walls. At some point, you will need to do the same thing for the parts above the doors too. If there are other people at home, they may open the door and cause a serious accident. To prevent this, always lock the doors when wallpapering above them. If the door does not lock, pin a warning note to the other side, or put an obstacle there.
- Archways: If you want to decorate an archway with wallpaper, overlaps are inevitable since the paper cannot stretch in multiple directions around an arching edge. So, do not try to stretch the paper on archways, and instead, focus on making the overlaps clean and unobtrusive. Also, if the two rooms that the archway connects have different wallpapers, use the wallpapers with a smaller design pattern for the archway to minimize the pattern break. However, the best way to decorate an archway with wallpaper is to install wallpaper only to the edges of it. You should paint the inside edges the same color as the ceiling in the adjacent rooms instead of wallpaper. This will link the archway with the rooms better. And you will avoid overlaps or crinkles on your wallpaper.
- Cutting Wallpaper For Recession: If your windows and doors are recessed from the wall, you should start wallpapering that wall by hanging up the two sides of the recession first. Measure the recession, and line the wallpaper on the wall by leaving this length of the paper coming over the recession as a margin. Then slice the paper horizontally at the top and bottom ends of the recession. And fold the loose flap to stick it to the sidewall inside the recession. Then you can install the top and bottom walls by cutting wallpaper short while leaving some margin for the recession depth, overlapping the sides, and folding the excess. This method works for archways too.
Wallpapering Around Fixtures – Wallpaper Awkward Areas
Another challenge while wallpapering a room is to make it seamless around the wall fixtures and other decorations. Although wallpapering itself is not too difficult to do, there are some points to consider.
- Confirming the placements: First, you should consider carefully whether or not you will want to move fixtures and pictures around once you have decorated. Because wallpaper makes it harder to patch a damaged spot left after moving a decoration on a wall.
- Removing picture hooks: Before installing wallpaper, you should also remove all the picture hooks and nails on the walls, even if they are very small. Later, you can put them in the same spot or decide on new places for them.
- Marking places: If you have some shelves or other fixtures that you want to keep in the same position, take them down and reinsert the screws, screwing all the way in. Stick the wallpaper over all the screws and the holes that any fixtures may leave behind. The screws will poke out a bit when you install wallpaper, revealing themselves. So, you can unscrew them and reinstall the fixtures.
Wallpapering Around Electrical Fixtures – Wallpaper Awkward Areas
Electrical fixtures make another awkward area to wallpaper. If you are not experienced in electrical work, you may have been considering putting wallpaper around the fixtures by cutting the paper just right. But that method is not a good idea as any small imperfection will ruin the look, and the wallpaper that is cut around the fixture will lift in time and look terrible. So, you should actually put the wallpaper under the fixtures. But you should take all possible safety precautions before starting. You can use one of the following methods;
- Removing fixtures: If you know how to remove and rewire fixtures yourself, be sure that you have cut the power from your electrical breaker box before doing anything. You can turn all the breakers off to be sure, just in case the lines may be connected to the wrong breakers. This way you can remove all fixtures without any worry. Then, you can push the loose wires inside the electrical junction boxes or the conduit holes in your wall, just enough to let wallpaper stick flush to the wall. After installing the wallpapers, cut small holes on the paper to pull the wires out again. And install the fixtures in the same places.
- Delaying electrician’s work: If you have a room rewired just before you decorate it, you can ask the electrician not to install socket plates and wall fixtures until the wallpapering is finished. You can use portable lights with extension cables from another room temporarily. And you can tell your electrician to install them after you finish wallpapering the awkward areas.
- Slipping wallpaper under: If you do not want to remove electrical fixtures from the wall during wallpapering, you can try to plan wallpaper placements so that the seams will occur behind the center of the electrical fixtures. You will then need only to loosen the fixtures and slip the wallpaper behind them.
Wallpapering Around Electrical Switches
Perhaps the next most common awkward area to wallpaper is around the electrical switches. After all, essentially every room should have at least one switch somewhere in it. To deal with wallpapering these awkward areas, there are three methods you can use.
- Cutting holes through: You can hang up the wallpaper by only sticking the top end first. Then you can let the paper fall loose in front of the switch, and make a pencil mark from each corner impression of the switch. Cut from the center out to each mark. Trim the resulting triangular flaps to leave a square hole. And stick the wallpaper around the switch.
- Slipping wallpaper under: You can orient your wallpaper placement so that the switch is centered on a seam. This way, you can just loosen the screws that hold the plate around the switch, pull this plate away from the wall and slip the wallpaper under it from both sides. Using a wallpapering brush, smooth the paper behind the plate. Retighten screws and wipe the plate clean.
- Removing switches: If you are experienced with electrical wiring, you can remove the electrical switches from the wall before wallpapering. You can cut a clean hole for connecting the switch again after you hang the wallpaper up. If you will do this, be sure that you keep electrical breakers off, not only while removing the switches, but also wallpapering, as the loose wires may touch each other, or your skin accidentally.

Wallpapering Around Corners
Usually, putting wallpaper around corners is not too difficult. Considering the walls and the wallpaper rolls should be perfectly straight, you should not have too many problems. As long as your walls and your wallpaper rolls are ideal, the method is pretty straightforward;
- For inner corners; you can prepare the wallpaper by folding the length horizontally, and printed-face inside. Then you can stick it to one wall while placing and pushing the folded edge inside the wall corner. Finally, unfold the wallpaper to stick to the other wall.
- For external corners; you can continue hanging the wallpaper as you did the rest of the wall, but leave some wallpaper excess after the corner. Then, you can just fold the excess backward and stick it.
However, sometimes the walls may not be perfectly straight, and the corners may have uneven edges. In such cases, you may need to use a different method.
Wallpapering Uneven External Corners
- Hang up a column of wallpaper by extending some of it over the external corner.
- Hang another column by overlapping the previous one by 2-4 inches (5-10 cm).
- Cut right through the center of the overlapping part from the top to bottom vertically with a razor.
- Once you cut all the way, carefully peel off the two strips of overlapping excess wallpaper that are next to the cut.
- Smooth the seam with a wallpaper-hanging brush to form a perfect join.
- Before the paste dries, remove any excess paste with a damp sponge.
Wallpapering Uneven Internal Corners
- Wallpaper around an internal corner, and trim 1 inch (2.5 cm) beyond.
- Place the next column on the second wall over the strip.
- To fit paper around an internal corner, cut two small slits at both the top and bottom of the length at the ceiling and baseboard.
- To ensure that wallpaper will not lift, run border adhesive along the overlap with a small brush. This is essential with vinyl papers.
Wallpapering Stairwells – Wallpaper Awkward Areas
Wallpapering a stairwell involves handling long lengths of paper, angled trimming, and rounding corners. These can be very difficult to do if you are inexperienced. You may need to follow these tips for this task.
- First, find someone to help you. While usually wallpapering can be done alone, wallpapering a stairwell will require you to handle long lengths of paper. To avoid angled seams while sticking the paper to the wall and damaging the paper while handling the long lengths, you should not try to do it alone. It is easier and safer for two people to handle long lengths of wallpaper.
- Measuring a stairwell is difficult because the bottom edge of each hang is angled. So you should start at the bottom of the stairs, and work up. This will make angled cutting easier to perform.
- Paste only one length of paper at a time. Keep soaking times consistent so that all lengths expand equally and patterns will match up exactly.
- Build a platform using sturdy scaffold boards and thick rope to bind them to ladders and stepladders. Double up boards if possible, and give lengthy spans extra midpoint support.
Wallpapering Around Pipes And Radiators
Pipes and radiators are very awkward and annoying obstacles for wallpapering. They have no straight edges to trim against, and it may be necessary to wallpaper the wall behind them. But you can overcome these obstacles with a few adjustments to your wallpapering technique.
Behind Radiators
Wall-mounted radiators may look almost impossible to put wallpaper behind without ugly seams, patches, or crinkles. But often there are ways to avoid such problems with radiators.
- Start with pipes: Start your wallpapering behind a pipe so that the joining seam will be hidden by it. By doing this, you will also eliminate the need for complicated trimming around the pipe brackets.
- Wallpapering behind pipes: In most houses, you can unscrew and remove pipe brackets, and feed wallpaper behind the pipes. Then you can locate the screw holes through the wet wallpaper and replace the brackets.
- Radiators With Brackets: If a radiator is bracketed to the wall, it allows the wallpaper to fall over it. Cut slits on the paper in line with the brackets. Using a radiator roller, feed the wallpaper behind, guiding it around the brackets.
- Keeping it clean: Remove wallpaper paste from bare metal pipes immediately, since it can cause corrosion, which in turn results in the unsightly staining of the pipes.
- Removing Radiators: In some cases, the only way for installing wallpaper behind a radiator without ugly spots is to remove the radiator. However, this is not an easy task and we would not recommend trying it yourself. Hire a professional plumber to remove radiators and cap off the pipes before you start to wallpaper. This is a quick, inexpensive job that will make wallpapering much easier.
You want to send birthday cards to your friends, relatives, and family members on their birthdays and you want to know the best birthday website. THIS birthday card website is the best at it.
Some Links for Your Home:
— When you need a home loan and mortgage to buy a house…
— When you consider installing a security alarm system in your home…
— When you call a home security company for an alarm system…
— When you’re thinking about insuring your home…
— When you plan to move home…
You can find the necessary information in the links on this page.
This article and this video are about; wallpapering behind pipes on walls, how do you wallpaper around difficult edges, wallpapering around windows, how to hang wallpaper around the external corner, how to paper around pipes, how to wallpaper light fixtures, How to wallpaper around awkward shapes…
.