Share Now:

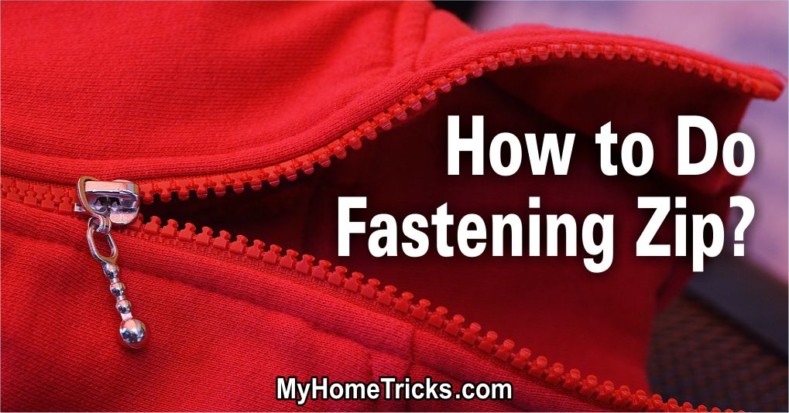
Fastening a Zipper
Most skirts and many dresses fasten with a zipper. Therefore, it’s useful to know how to properly fasten a zipper. If it is inserted poorly, it can easily ruin the finished look of an otherwise excellent garment.
Zips (or “zippers”) are usually inserted into an opening in a seam, and they can be centered behind the seam line or set to one side. The latter method of fastening a zipper is more suitable for skirts and close-fitting garments and is slightly easier to do. However, the symmetrical stitching of the centered zipper makes it well-suited to center front and center back positions.
How to Fasten a Zipper
Wherever the zipper is to be placed, the correct preparation of the opening is necessary. Sew the seam where the zipper is to be inserted, leaving an opening that is slightly longer than the zipper. Remember to fasten off securely at what will be the base of the opening.
Now, baste the remaining section of the seam closed, precisely along the seam line. Neaten the seam and press it open, taking care not to stretch the basted section.
Insert the zipper using one of the methods shown on these pages. Use the zipper foot on your sewing machine. It can be moved from side to side, depending on which side the zipper teeth are on when you are stitching. Do not trim off the zipper tapes at the bottom of the zipper.
Once complete, carefully press the zipper opening, taking care not to create indentations of the zipper teeth on the right side of the garment. A centered zipper has two lines of stitching that are equal distances from the actual opening edge. The zipper teeth lie directly under the opening edge.
With a lapped zipper: There is really only one visible line of stitching, and the zipper teeth are centered between this stitching line and the pressed edge of the zipper opening. The two lines of stitching that hold the zipper in place are done separately and should be stitched in the same direction, either from top to bottom or vice versa.
Fastening Zipper: Inserting a Lapped Zipper
- Remove the basting that holds the zipper opening closed. Place the zipper under the right-hand edge of the opening so the pressed edge lies next to the zipper teeth; the zipper stop should be positioned just above the base of the opening. Pin and baste the zipper in place along this edge. Stitching from the right side, with the zipper foot attachment on the machine, stitch this side of the zipper in place, as close as possible to the zipper opening edge. Fasten off securely.
- Now bring the other edge of the zipper opening over the zipper so that this free-pressed edge just covers the first line of stitching. Pin and baste the zipper into position along the left-hand edge. Now stitch this side of the zipper in place, stitching 1-1.2cm (3/8-1/2in) from the pressed edge. Remember to stitch across the base of the opening to the seam-line.
Inserting a Centered Zip
- With the zip opening still basted closed, lay the closed zip against the wrong side of the fabric. The zip teeth should be directly over the basted seam, and the zip stops at the lower edge just above the end of the machine stitching. The slider of the closed zip should be about 2.5cm (1 in) from the top of the opening. Insert the pins at right angles to the zip. Now, working from the right side, baste the zip in place, working two parallel lines, one down each side of the zip to serve as stitching guidelines.
- From the right side, and using a zipper foot attachment on your machine, stitch the zip in place. Start at the top of the left-hand edge and stitch 6-8mm (1/4-3/8 in) away from the basted seam line. At the base of the opening, just below the zip stop, stop stitching with the needle in the fabric, raise the machine foot, and swing the fabric so that you can stitch across the base of the opening. Now swing the fabric again and complete the zip insertion by stitching along the right-hand edge of the opening, stitching the same distance away from the basted seam line as before. Remove basting.
Fastening Zip: Buttonholes and Buttons
Buttonholes should be marked very carefully and stitched accurately. If a buttonhole is placed on a band, it should run parallel to the long edges of the band, not across it. And the button it will fasten over should also be placed centrally across the band.
Many sewing machine manuals will tell you the best way to sew a buttonhole using that particular machine. A buttonhole is basically two rows of very short, narrow zigzag stitches worked next to each other, with wider zigzag stitches worked across each end. To achieve a buttonhole that is really even, loosen the tension of the top thread slightly so that the stitches interlock just to the wrong side of the work, leaving the right side neat.
A buttonhole should be slightly longer than the button that is to pass through it. About 1-2mm (1/24-1/12 in) longer is sufficient unless you are using a very thick button, where it may need to be slightly longer still. Take great care when cutting the buttonhole so that you do not accidentally cut through the stitching. The two rows of stitching forming the sides of the buttonhole should be just far enough apart to allow you to cut between them. Use small, very sharp scissors to cut the buttonhole after it has been sewn. Stop cutting just before you get to the end stitches.
When a button is attached, it should stand just above the surface of the garment. That way, once the garment is buttoned, the button will lie flat against this second section without distorting it.
.

Fastening Zip: Hooks and Eyes
Hooks and eyes are often used to fasten waistbands and neck edges. Those with loop-shaped eyes are used where there is no overlap, and those with bar-shaped eyes are used where there is an overlap. The hook and eye are sewn on by hand using a double thread. Position the hook on the wrong side with the end even with the garment edge.
A loop-shaped eye is positioned on the wrong side of the garment, opposite the hook, with the end protruding beyond the garment edge just enough to allow it to be fastened. A bar-shaped eye is sewn to the right side of the underlap.
Making a Buttonhole
- To make a buttonhole, start by working the first side forward, then work one end set of stitches. Next, the second side is usually worked in reverse, ending with the second set of wider stitches. If your machine does not work the reverse stitches as evenly as the first side, then work this side forward as well by turning the work at the first end of the buttonhole.
Attaching a Button
- Start by sewing on the button using a double thickness of sewing thread and leaving all the stitches slightly loose. You may find it easier to do this if you slip a matchstick between the button and the fabric. Once the button is attached, wind the remaining thread tightly around the shank of threads created. Work one or two stitches through this shank and cut off the thread.
More:
Tip: Here, we have provided some solutions about fastening zips. For more information, please click on the “tags” below.