
Share Now:

The first stage of the decorating process is important to the production of a top-quality finish. But it is often perceived as the most tedious. Taking time to prepare a wall thoroughly before painting will ensure a good result.
Getting Surfaces Ready
Protecting surfaces that are not to be painted is as important as preparing those that are. To prepare the room to protect it from damage and to make the working area easier to identify, it is advisable to remove all furniture from those areas of wall needing the most attention.
Clearing and Covering
• Protecting furniture: If it is not possible to move all the furniture out of a room, stack large items in the center of the room and fit smaller pieces around them. Drape a plastic sheet over the furniture to keep dust off. Secure around the bottom with masking tape.
• Covering floors: Cover floors with drop cloths or old house¬hold sheets. Use a double thickness of the latter since they are less impermeable.
• Stopping movement: Secure dropcloths in position by baseboards with masking tape to prevent them from creeping.
Filling Walls
• Mixing filler: Mix filler to a firm, paste-like consistency. If too wet, it will shrink too much in a hole when it dries if too dry, it will be difficult to work and dry too quickly.
• Storing prepared filler: If you prepare too much filler, store the surplus, covered with plastic wrap, for later use.
• Filling large gaps: Use newspaper to pack corner cracks and provide a base for filler. Deep holes will need a second fill before sanding,
• Overfilling: Fill any holes slightly above the wall surface to allow for shrinkage.
Repairing Corners
Using support: To repair an external corner, nail a wood strip flush with one edge, then fill against it. Once the filler dries, remove the strip. Repeat on the other edge, and lightly sand.
Making Alterations
• Putting up coving: Strip old wallpaper before attaching new coving to walls. Put coving in position before doing any further painting preparation.
• Replacing woodwork: If you want to replace moldings or baseboards, do so before you paint the walls in order to avoid the possibility of them being damaged after they have been painted.
• Organizing professionals: Hire qualified tradespeople to carry out any major electrical or plumbing alterations that are necessary before you start painting. Arrange for them to return once you have finished the decorating in order to attach any fixtures for you.
Using a caulking blade: If a wall has numerous scrapes and holes, use a caulking blade to spread filler across the whole or a large part of the damaged area. The broad blade surface will cover the area efficiently.
Preparing Walls
A smooth wall surface is essential since paint highlights rather than hides imperfections. Sand excess filler and other rough areas back to a flat finish that is smooth to the touch. Prime with an appropriate sealer to stabilize the surface and make it ready to accept paint.
Sanding & Sealing
• Sanding large areas: Use an electric sander for preparing large expanses of wall. Renting one for a day is not expensive.
• Maximizing use: Once coarse sandpaper has become worn, you can use it for fine sanding before throwing it away.
• Sealing new plaster: Dilute ten parts of flat latex with one part water for use as an excellent primer on new plaster. Choose white latex since it is the least expensive.
• Sealing dusty walls: Mix one part PVA glue with five parts water to make an excellent sealer. It will have strong bonding properties and be ideal for use on powdery walls.
Making Sanding Easier
Saving time: Before sanding, remove lumps of plaster or filler with a scraper. Only a light sanding will then be needed for total smoothness.
Using a sanding block: Wrap a piece of sandpaper tightly around a wood scrap to provide a firm base as you sand a wall. Rotate the sandpaper around the block as it wears.
Cleaning
Reaching a ceiling: Rather than climbing a ladder with a bucket of water, use a squeegee mop to catch up. Using detergent Use a mild detergent for cleaning, then rinse with clean, warm water.
Preparing Paint
Paint will produce the finish that you require only if it is prepared correctly before you use it. Problems such as poor color matching,
shadows, and a poor finish are usually not the fault of the paint manufacturer more often they are the result of poor preparation by the user.
Mixing Paint
Maintaining color: You may require several cans of paint when decorating a large room. Pour all of them into one large bucket and mix to conceal color differences. Use a bucket with an airtight lid for storage.
Removing Lumps
Sieving paint: However well it is stored, the paint may form a skin in, or acquire lumps and foreign bodies. Use a household sieve when decanting paint into a paint bucket to separate out these impurities.
Stirring & Decanting
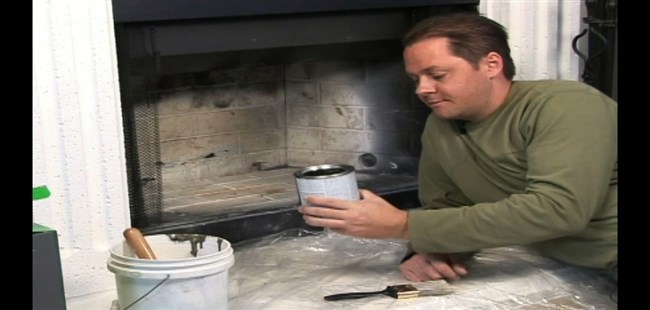
• Protecting paint: Before opening a can of paint, always use a soft brush to remove dust and dirt from the rim of the lid. Impurities may otherwise fall into the paint as you ease off the lid.
• Hand stirring: Stir paint in several different directions rather than in a one-directional movement. Use a slight lifting motion as you stir to ensure an even color throughout and the dispersal of paint up from the base of the can.
• Lining paint buckets: Use foil to line a paint bucket before decanting paint into it. Once the job is finished, the foil can be thrown away and there is no need to clean the bucket.