Share Now:

Floor tiles are usually larger and more substantial than wall tiles because they are load bearing and need to be more robust. There is a large variety of hard tiles from which to choose to complement other decoration in a room.
Designs And Techniques
Laying floor tiles is similar to attaching wall tiles, and many of the same principles and techniques apply. Mistakes in laying floors can prove expensive to rectify, so always make sure that you plan the job very carefully before you start work, and follow, the instructions.
Laying Quarry Tiles
• Planning a layout: When working out exactly where floor tiles are to be positioned, use a tile gauge.
• Starting out: In rooms with straight and tall walls, use the baseboards as guidelines. This should reduce the amount of cutting necessary on at least two walls. If the walls are not true, start tiling from battened edges. Leave a gap between battens and walls so that infill tiles used to finish off the floor will be at least half-sized.
• Using mortar: Always lay quarry tiles in a thick bed of mortar, rather than applying ceramic tile adhesive.
Designing Layouts
For an intricately patterned floor, make a plan to scale of where each tile will be positioned. This is especially important when you are intending to use marble inset tiles, to ensure that each one is laid in exactly the right place.

Keeping Tiles Level
Using a depth gauge: Hammer a nail through each end of a short length of batten so that the nails protrude by Vi in (1 cm). Run this tool over the mortar, with the nails reaching through to the floor, so the mortar will be consistently V2 in (1 cm) thick.
Time-saving Tip
Making a template: Most floor coverings need a few fussy cuts. Make templates around all obstacles, and let your local supplier make all your floor-tile cuts for you.
Making a template: Most floor coverings need a few fussy cuts. Make templates around all obstacles, and let your local supplier make all your floor-tile cuts for you.
Spacing Floor Tiles
Floor tiles rarely have spacing mechanisms built into their design, so wedge pieces of thick cardboard between the tiles to keep them apart. Remove these improvised tile spacers once the mortar has started to set.
Tiling Baseboards
Cleaning easily: Attach a line of quarry tiles along the base of a wall as a substitute for a baseboard. You will then be able to clean easily, with no gap between floor and wall.
Safety
If you rent a disk cutter to speed up floor-tiling, follow these safety precautions.
Following instructions Always read manufacturers’ guidelines about operating disk cutters safely. Protecting yourself: Wear a dust mask and goggles to protect the eyes from splinters.
Ceramic Tiles
Much of the methodology for laying hard floor tiles can also be applied to ceramic floor tiles. However, with ceramic tiles, you will have a little more flexibility when it comes to laying techniques. Since they are less heavy- duty, ceramic tiles are easier to work with.
Making Adjustments
• Dealing with doors: Remove doors that open onto a tiled floor surface before laying the tiles. Shave the same amount off the bottom of the door as the depth of a tile plus a little extra to allow for adhesive.
• Finishing off the threshold: Cut a strip of hardwood doorstop the same width as the door to create an excellent threshold strip that is both decorative and provides a good barrier against which to tile.
• Keeping level: Check that tiles are level from time to time by running a level or batten over the surface of newly laid tiles. Make any, necessary adjustments while 1 the adhesive is still wet since mistakes will be difficult to rectify once it has dried.
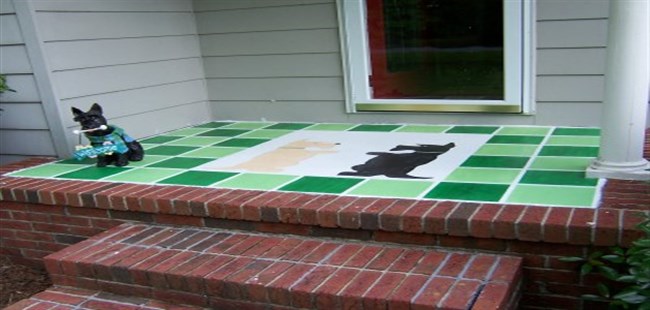
• Using inserts: To give a tiled area an opulent feel without spending a lot of money, buy a few high-quality, patterned tiles, and design a panel to insert in an appropriate place to lift the floor’s appearance.

Making Mosaic Panels
Using an MDF base: When creating a mosaic panel as an insert feature to enhance a plain floor, attach the mosaic tiles to a piece of MDF cut to measure. The MDF will provide a rigid, sturdy base.
Cutting Small Pieces
Using a nipper: As with wall tiles, when you need to cut intricate shapes – or if you want to cut up pieces of tile for insertion in a mosaic – use a nipper to give you greater accuracy.
Inlaying Mosaics Within Tiled Floors
1. Leave a hole the size of the area required by the mosaic design within the floor layout. Cut a piece of MDF to fit the hole, making sure that it is of the correct thickness so that, once tiled and inlaid, the mosaic will be level with the surrounding tiled surface.
2. Draw the design you want on the MDF, and fill in with mosaic tiles. Make sure that you use floor adhesive to mount them in place, as this is the strongest method. Once complete, fit the mosaic into its hole. Use floor adhesive to attach the base in position.
Creating a Rustic Look
As well as tiles that are custom or factory-made, there are other alternatives that you can use for decorative hard flooring. These include a variety of more natural- looking materials. The particular characteristics of these products mean that you should consider practical requirements carefully.
• Flagstones: These are extremely heavy-duty and can be found in regular or irregular shapes. Their surfaces tend to be uneven, so it is essential that you bed them in with plenty of mortar.
• Bricks: These are best laid on their sides, especially if you want to create a herringbone pattern. Bricks should be bedded in mortar and butted up lightly together. Once laid, cover with several coats of varnish or commercial floor sealer to seal the surface.
• Slate: Make sure that the subfloor is perfectly level before using slate tiles. Lay them onto the adhesive, taking great care to prevent it from getting on the upper surfaces of the tiles, since it may stain them permanently.
Moving a heavy slab: Move a heavy stone slab using a simple yet effective method. Maneuver the slab onto two poles, then push the slab along as if it were on wheels. Bring each pole to the front as it is left behind as the slab progresses.
Painting Floors
Concrete bases and wooden subfloors can be painted rather than covered with flooring. Commercial floor paints should be used in high-wear areas, but other paints are acceptable on less well-used floors, as long as you varnish them well.
Creating Wood Effects
One of the advantages of creating a wood effect is that it is far less expensive than laying a wooden floor. Using color cleverly, you can imitate natural wood convincingly. Alternatively, if you choose to use vivid colors, you can create an altogether surreal finish.
Preparing to Paint
• Checking: Read manufacturers’ guidelines before painting sheet flooring (hardboard and chipboard). Some sheets are impregnated with fire-retardant chemicals that render them unsuitable for painting.
• Filling: Fill imperfections on the surface of sheet flooring with all-purpose filler, which can be sanded back to a smooth finish. Fill small gaps between sheets with flexible filler, so that the cracks will not reopen when walked on.
• Painting: Use a roller rather than a brush to paint a floor quickly. Attach an extension pole to the roller so that you can paint standing up.
Painting a Faux Rug
Wooden surfaces can offer an ideal opportunity for trompe I’oeil effects, and a faux rug can be particularly eye-catching. The edges of floorboards provide ready-made guidelines for painting bands of color.
• Planning a design: Work out a complete design for the faux rug before you start painting. Decide where on the floor you want the “rug” to be, then measure out an area guideline.
• Painting narrow stripes: Use a mini roller for painting any narrow colored stripes.
• Increasing realism: Add fine detail freehand to increase the realism, or “cheat” with stencils.
Adding the tassels: Use an artist’s brush to finish a faux rug by painting tassels at each end. In reality, rug tassels are often pale in color or off-white, but vibrant colors show up better against wood.
Creating the Impression of Painted Floorboards
Base-coat the floor, then draw pencil guidelines to represent the floorboard edges. Use an old plank or floorboard as a template, which will automatically give you “boards” of the right size.
Mix up a glaze: Using the plank as a straight¬edge, apply a coat of glaze to each “floorboard.” Draw a rocker through the glaze. Create knots by agitating the rocker backward and forward.
Once the glaze is dry, go over the pencil guidelines with a dark felt-tip pen. This will outline each “floorboard.” Finally, cover the whole floor with two or three protective coats of acrylic matte varnish.
Creating Tile Effects
As in the case of wood effects, painting faux tiles rather than covering a floor with the real thing will greatly reduce your decorating expenditure. Tile effects are ideally suited to concrete bases: extra realism is provided by die noise created by walking on the surface.
Creating “Hard Tiles”
• Ensuring dryness Make sure that a floor has totally dried out before you paint it. A new concrete base should not be painted for several months.
• Sealing a floor Dilute commercial floor paints slightly for the first coat in order to prime and seal a floor surface. If you use alternative types of paint, make sure that you coat die floor with a commercial sealer before you start.
• Choosing a base color Choose a light color for the first coat. This will not only provide a realistic grout color but will also make a good foundation for the subsequent tile colors that you choose.
Applying effects: Marbling and sponging are two paint- effect techniques that are particularly useful. Use either or both to imitate various types of hard floor tile.
Creating the Impression:“Tiling” freehand Painting a tile effect need not be an exact science. To avoid the need for pencil guidelines, use a square object to produce the tiles by means of block printing.
Use a roller tray as a paint reservoir. Load a sponge with paint, removing excess. Place the sponge firmly on the floor, then apply pressure to print a well-defined tile shape. Leave gaps to represent grout.
Terracotta Tiles:Using a sponge Make a block for creating “tiles” from a household sponge. Most are rectangular, so cut one down to tile size. Use the trimmed pieces for filling in detail.
After producing 10-20 “tiles,” apply more paint to each one with a small piece of sponge to increase opacity. This buildup of depth will help to make the tiles look textured and more realistic.
Faking Checkered Vinyl Tiles
1. Apply a base coat to a floor and let it dry. Measure out and draw a checkered pattern with a pencil. Cover alternate squares with pieces of newspaper. Spray black paint over the exposed squares.
2. Once the black paint has dried, peel, away the newspaper masks to reveal a checkered, fake vinyl-tiled floor. As with all paint effects applied to floors, finish with a protective coat of varnish.
Good Idea
Checkering wood: Create a checkered effect on floorboards with wood stain. Use floorboard edges and masking tape to define the squares. Brushwood stain on alternate squares, which will highlight the wood grain and increase the contrast.