Share Now:

Sowing seeds in trays or pots, either in a greenhouse or on a windowsill, gives you control over the growth of the seedlings.
The extra warmth is especially suitable for seeds that do not germinate reliably outdoors.
Sowing in Trays
Trays are ideal containers for sowing seeds they already have drainage holes and are the correct depth for the early development of seedlings. If you want to grow only a small number of any one type of seedling, choose trays that are divided into strips or cells.
Sowing Seeds in Plastic Trays
Large lumps of soil mix inhibit seed germination. If you do not have a screen, remove large lumps from the soil mix by hand, and place them in the bottom of the tray.
Use the bottom of an empty seed tray to level the soil mix. Holding the tray level, press it down firmly into the soil mix to create an ideal surface for sowing.
Dry your hands thoroughly, and place a small number of seeds in the palm of one hand. Gently tap your palm with the other hand to distribute the seeds evenly.
Traditional Tip
Sowing fine seeds: Sowing fine seeds evenly can be difficult. To make it easier, fold a piece of cardboard or paper in half. Tip the seeds into the fold, and gently tap the cardboard with your finger to scatter the seeds over the soil mix.
Covering small seeds: Small seeds should not be covered with too much soil mix. To avoid dislodging the seeds when covering them, use a screen to shake a fine layer of soil mix over them.
Successful Sowing
• Sticky hands: To stop seeds from sticking to your hands, sow seeds in a cool room, or run cold water over your wrist before you begin sowing.
• Watering: Water the soil mix before you sow seeds, to prevent them from being washed into a heap.
• Tiny seeds: Settle tiny seeds into the soil mix with a fine mist from a plant mister.
• Light: If your seeds require light for germination, cover the tray with a sheet of glass or plastic wrap to prevent the soil mix from drying out.
• Heat control: Too much or too little heat can hinder germination. Invest in a propagating thermometer.
Sowing In Pots
Some seeds, particularly large ones, are best sown in individual pots, since they need room to develop. This also minimizes root disturbance when the seedlings are transplanted. Using separate pots is ideal if you are planting only a small quantity of each seed.
Filling Gaps
Use thinly sown seedlings in pots as temporary gap fillers to provide spots of color in flower beds. You can plant out entire pots and then remove them once the beds fill out.
Avoiding root disturbance Roll newspaper strips into VA in- (3 cm-) diameter tubes. Fill each one with soil mix, and moisten before sowing the seeds. Plant out each tube; the roots will grow through the newspaper.
Seedling Containers
Use empty household pots as seedling containers. Yogurt and dessert containers make good pots, and margarine tubs can be used as seed trays. Make sure that you clean all containers thoroughly and remember to make drainage holes in the bottom.
Looking After Seedlings
The correct conditions and proper care are essential for growth once seeds have been sown. Always consult each seed packet for details on temperature and light requirements. When the seeds have germinated, the seedlings usually require a lower temperature.
Caring For Seedlings
• Using fungicide: Prevent fungal diseases from developing by drenching the soil mix with a copper-based fungicide before sowing seeds. Repeat once the seedlings have emerged.
• Best conditions: Provide plenty of natural light, increase air circulation, and lower the temperature.
• Sun scorch: Do not put developing seedlings in direct sunlight, since this may cause too great a rise in temperature.
• Reflecting light: If light levels are low, place trays or pots of seedlings on aluminum foil. Put foil behind the seedlings, too, to ensure that they receive plenty of reflected light.
Using Plastic Wrap
Versatility: Cover seedlings with a sheet of plastic wrap to conserve moisture, keep out drafts, and keep the temperature constant.
Preventing condensation
Remove the plastic wrap from time to time to prevent the buildup of condensation. Allow any water droplets to run back into the tray or pot before replacing the plastic.
Providing Light
Lighting Light is essential for the development of sturdy seedlings. Seedlings that do not receive enough light soon become pale and leggy.
Turning Toward The Light
Seedlings grown by a window or exposed to a one-sided light source will grow toward the light. Prevent them from becoming lopsided and bent by turning the container regularly.
Ideal Germination Conditions
Some seeds are capable of germinating under almost any conditions, but most have fairly specific requirements. Temperature is a major factor. Check the recommended temperature for sowing, and make sure that you provide it throughout the germination period.
Greenhouse Bench
Seeds and seedlings that do not require much heat can be placed in a frame or on a greenhouse bench. Cover them with plastic wrap to help reduce temperature fluctuations and exposure to damaging drafts.
Direct Heat
Seeds that require high temperatures for germination can be placed directly on a heated propagating mat in a propagator. This makes it possible for them to benefit from the highest temperatures.
Indirect Heat
Some seeds and seedlings can be damaged by high temperatures, but still, require extra warmth. Place them on an upside-down tray in a propagator so that they are not in direct contact wide the heated propagating mat.
Propagators
• Condensation: Wipe the inner surface of the lid regularly to remove condensation, which can reduce the amount of light reaching the seedlings if it is allowed to build up.
• Algae: Wiping the lid of the propagator will also prevent the buildup of algae, which not only looks unsightly, but also preventsi^ight from reaching the seedlings.
Using a Propagator : Uneven heat The heating element in the propagator may supply heat unevenly. Find the warmest and coolest areas, and use them for the appropriate plants.
• Water supply: Always keep the capillary matting at the bottom of a propagator moist. This ensures a constant supply of water for the seedlings.
• Cleaning: After each use, clean out the propagator thoroughly to limit the risk of disease buildup. Take care not to wet the electrical apparatus.
• Safety: If you are worried about the safety of your propagator, have it checked by a qualified electrician.
• Bottle propagator: To make a basic propagator, cut off the bottom of a clear plastic bottle, remove the screw top, and place the top half of the bottle over a pot of seedlings.
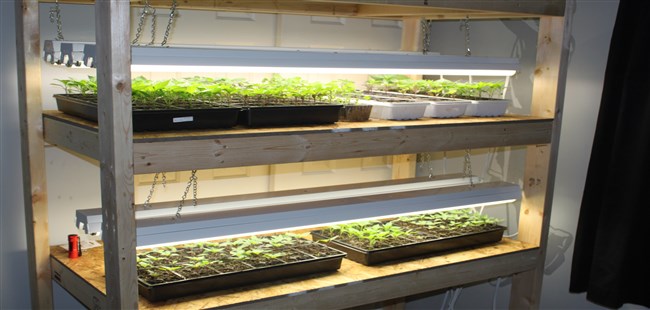
Money-Saving Tip
Ready-made propagator: Use the warmth of a linen closet to propagate seeds that do not need light. Check the temperature on each shelf with a thermometer to determine the best place for each tray. Cover the trays with plastic wrap, and check them daily. Remove each tray as soon as the first seedlings emerge.
Collecting And Storing Seeds
Collecting seeds from your own plants is great fun and can be a very inexpensive and exciting way to fill your beds and borders with color. Swap your seeds with friends and neighbors, too. Remember that home-saved seeds may not grow true to type.
Catching Seeds
Paper bag: Most garden plants reliably set seed. Tie a paper bag loosely around ripe seedheads to catch the seeds as they are released.
Collecting Seedheads
Cut ripe seedheads off plants, and shake them to release the seeds inside. Store these in an envelope or paper bag. Mark each one clearly with the plant name and date of collection.
Storing Seeds
Suitable containers: Seeds are best stored in an airtight container. They must be completely free of moist plant material; otherwise, they may rot or start to germinate.
Excluding Light
Black film canisters are good for storing seeds. Be sure that the seeds are thoroughly clean and dry before putting them in the canisters, and remember to label each canister clearly.
Collecting Seeds from Vegetables and Fruits
Plant variations: Many vegetable varieties will not produce plants identical to the parent plant, so be prepared for variations.
Scooping Out Seeds
Choose ripe, healthy-looking vegetables or fruits. Cut each one in half, and carefully scoop out the seeds. Examine them carefully, and discard any that do not look perfect.
Storing Pods
Seed pods: Seeds in pods should not be stored in airtight conditions. To dry naturally, the pods require air circulation. Once the seeds are ripe, they can be removed.
Drying Seed Pods
Store pods on newspaper in a seed tray until they are quite dry. Do not apply artificial heat. When the pods are completely dry, carefully remove the seeds, and store them in paper bags.
Diseases: Some viral diseases are seed-borne. Minimize the risk of producing unhealthy plants by collecting only from healthy-looking plants.
Drying Seeds
Dry home-saved seeds by spreading them out on a clean paper towel. Put this into a clean, dry seed tray, and allow the seeds to dry thoroughly. Store them in a cool, dry place.
Cyclamen Seeds
Seed capsules: Collect seeds from hardy cyclamen as soon as the capsules begin to split open. Tie a paper bag loosely around the capsules to ensure that no seeds are lost.
Soaking seeds: To improve germination, remove the seeds from each capsule and soak them overnight. Sow them as soon as possible.